Celebrity
How to do hospital corners: The unexpected kitchen utensil I swear by for making perfect hospital corners

Many moons ago, I found myself touring a hotel school where we were shown a demonstration of how its students made a bed for a client.
Little did I know I was about to be taught how to do a hospital corner, a nifty trick that has stuck with me for many years.
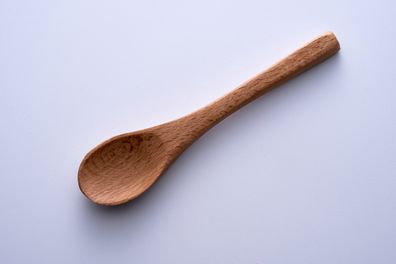
Over the many weekends spent using this technique, I have fine-tuned my process to a science. My biggest tip, rather uniquely, involves a wooden spoon.
Watch the video above.

Hospital corners were created before the invention of the fitted sheet. The bed-making method secured a flat sheet to a mattress, though today it is more helpful in keeping your bed tidy and snuggly.
Personally, I like to use the method on just my top sheet; however, you can also include quilts and other bedding in the mix.
How to do hospital corners
I start by putting down my fitted sheet. Once I feel I can bounce a coin on top of the taut base, I’ll lay the flat sheet on top.

I spend a quick moment evening out each side of the sheet that hangs off, before tucking the end of it under my mattress at the foot of my bed.
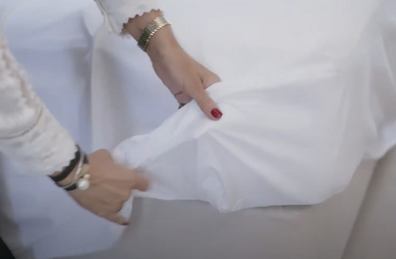
Walking to the side of my bed, I crouch down near the corner and take hold of the excess sheet from the end of the bed.
Pulling the leftover sheet in line with the side of my bed towards the top, creating a triangle, I tuck it all under the mattress, leaving the side of the sheet untouched.
You should be left with a neat end of the bed, a flap, and an edge that is still hanging off the side.

For the final move, pull the side of the sheet down over the previously tucked fabric and neatly tuck it in with the rest.
While doing this step, ensure you create a crisp line that runs from the top to the bottom of your mattress’s corner.
Now, you should be left with a bed that has its ends all tucked in and two hospital corners. The rest of your top sheet will still be untucked on the other sides.
The rest of this routine was not a part of the hotel school’s tutorial, but I think they’re missing out on its inclusion.
If you’ve ever had a fresh manicure, you would be familiar with the pain of delicately navigating life while trying to maintain your nail polish.
When I found myself in this predicament a few years ago, the last thing I wanted to do was shove my nails between a bedframe and a mattress.
Enter the wooden spoon.


How to remove the common stains from clothing and bedding
In a last-ditch attempt to prolong the life of my nails, I reached for a wooden spoon and used it to push my sheets under the mattress.
I am telling you right now, you would be shocked at how tidily and securely a wooden spoon can make your sheets.
For a daily dose of 9honey, subscribe to our newsletter here.

Start at the foot of the bed. Push the sheet under your mattress as far as it will go. With the spoon securely in place, continue shovelling your sheet until you reach the top.
Then, fold the very top of the sheet over itself to create a fold and secure it in place using a wooden spoon.
FOLLOW US ON WHATSAPP HERE: Stay across all the latest in celebrity, lifestyle and opinion via our WhatsApp channel. No comments, no algorithm and nobody can see your private details.